Showing posts with label Google Drive. Show all posts

Monday, August 25, 2014

The Google Drive Application


Last year and this past summer, several of you installed the Google Drive application on to your computer.  If you are needing to install this application on your computer again, please scroll to video below.  It will walk you through the process.  If you are new to the Google Drive application, then read on!

The Google Drive application gets installed on your computer desktop allowing you to sync your files between your desktop and the web.  You may be asking yourself what that means.  It means if I'm working on a Pages document, I can save it to Google Drive, either through the Google Drive folder on my computer or via Google Drive on the web.  While I can't edit the Pages document on the web, I can open and edit it through the Google Drive folder on my computer.  This means if my computer ever crashes I still have my Pages document.  I haven't lost it.  It also means if I have a computer at home with Pages on it, I can install the Google drive folder onto that computer and open/edit my Pages document without having to email it to myself and then email it back to myself for the next day at school.

Maybe you're thinking, that's nice, but I don't use Pages.  That's ok.  The other advantage of having the Google Drive folder on your computer is getting to your files faster.  If I need a specific file in Google Drive, I can either run a quick search on my computer or go straight to the file in my Google Drive folder.  I click it on and it instantly takes me to the file on the web.  I might need to login, but I just cut down the number of steps it took me to get to that file.

Personally, I have started using Google Drive as my own online storage for almost all of my files.  I've started storing videos, images and audio recordings in my Drive along with all my regular word processing files and spreadsheets.  The only drawback is you only get 30GB of storage.  For most people, that is plenty of storage, but for the video and photo hounds out there this might not be enough storage.

Installation Instructions
Before you install the Google Drive application on your computer, please make sure it's not already on your computer.  You can do this by going to your applications folder and looking for the application Google Drive.  If it is already in your list of applications, then click it to open.  If it is not in your list of applications, then follow the instructions in this video:


Tuesday, June 10, 2014

Google Drive Face Lift

The continual shifts and changes in technology never cease to amaze me.  I just finished Google Drive training two weeks ago, and while we had a great time discovering how to make Drive work for us, Google just introduced it's new Google Drive look a couple days ago.  I actually like the new, cleaner look, although there are a few changes in where things are located and how they function.

New Look for Google Drive

Let's take a look at some of those changes and help you get acquainted with this new look:

1.  Shared with me - This is now referred to as "Incoming."  It is still in the left-hand column directly under the My Drive folder.  When you click it on, you see the documents listed as...

  • This week
  • Last week
  • Older
When you look at the files themselves, you will see who shared the file first followed by the file name.  If you have added a file to a specific folder you created in Drive, it will show you that information too. 


 This is all you will see until you place your cursor at the end of the file.  Then you have options for downloading the file, adding it to My Drive (if you haven't already done this), and more actions (the 3 little dots).  Your options under more action may be limited due to the defined sharing settings given to you by the owner of the document.  If you can only view or comment on the file, then the Share and Rename options are grayed out.  The Share icon will even have a line drawn through indicating that you cannot share that file with other people.  Also under more action is Open with..., which allows you to choose what application you want to use to open that file.  Naturally, if you just click the file it will open for you in Google Drive or in a preview window.


At this time, I have not found a way to sort your Incoming files by owner, so all the files are sorted by date.

Settings Icon
2.  Settings icon - This has also received a more streamlined look.  In the past, you had more options under this icon related to how uploaded files would be converted.  Now everything is accessible when you choose settings under the icon.  You can set-up how files will be converted when they are uploaded to Google Drive, as well as managing the apps you've connected to in Drive and Chrome.

You can also Download Drive to your computer from this location.  If you recall, you had to choose Install Drive, which was tucked away under More in the left-hand column.

Currently, you have the option to experience or leave the new Drive under the settings icon, but that option will go away soon.  My suggestion...embrace the change now.

New Button
3.  Red New Button - This use to say Create and had an upload icon right next to it.  The New button has it all.  The ability to create new file types (documents, spreadsheets, drawings, folders, etc.) and the ability to upload files to Google Drive.  A new feature under this button is uploading folders to Google Drive.  This has not been possible in the past, so it is an exciting new feature!  Like before, you can get connect to more apps that can be used with Google Drive documents and spreadsheets through this New button.

4.  Working with Files - Before the new look, a single click on a file or folder would open it up for you.  If you wanted to select a file or folder and do something to it (move to the trash, share with other people, etc.), you had to click on the check boxes.  Now, a single click simply selects that file or folder so you can make changes to it.  You can even select multiple files or folders by holding down the command key (on a Mac) and click what you want to select.  If you actually want to open the file or folder, you have to double click.

Another change is where you go to make specific changes to files and folders; changes like sharing, organizing, previewing, etc.  In the old look, all those features were located under the word More at the top of your Drive.  Now the those options are available through icons at the top of your Drive and via the 3 little dots, also at the top of your Drive.  Check out the differences in the two images below...

Old Look

New Look
5.  Search - While this feature isn't new, or even changed for that matter, many people don't realize they can do a quick search for specific files.  This is a handy feature, especially if you have a large quantity of files in your Drive.  You can do a basic search by typing in part of the file name in the Search Drive box.  As you are typing, Drive will start displaying a short list of potential matches, however, if you hit return it will give you a full list of files with that word or phrase in the name.  The catch to this search is when you use more than one word they must be in the same order as they are in the file name.  For example, if I name a document Summer Projects 2014, I can search by individual words (summer, project, 2014) or even by the phrase summer projects; however, if I search by 2014 summer, I won't find that file.

Advanced Search Options
The search feature does have some advanced searching capabilities.  These include searching by file type, ownership, and opens with (designating what application the file should open in).  This can be useful if you have 20 summer project files but some are documents and others are spreadsheets.  You could at least narrow your search by adding the file type indicator along with the phrase summer project.  If you only created one of those 20 summer project files, then you could choose to search by ownership.

Want to try out the new Google Drive?
  • Go to the Settings icon - looks like a gear wheel on the right side of your Drive screen
  • Choose Experience the New Drive
 Enjoy the NEW Google Drive!

Wednesday, October 30, 2013

Getting YouTube Videos for Student Assignments

Sometimes you find a great YouTube video to introduce, reinforce or review a concept being taught in the classroom.  As educators in our district, you can access and show those videos through your teacher computer, but what happens if a student is absent.  Sometimes, it is necessary for students to watch video content at different times based on the progress they are making in an individual project or assignment.  Below are in instructions on how to download YouTube videos and share them with your students.


Need to print this how-to sheet?  Click here - Install YouTube Downloader

Website Wednesday

Website Wednesday is back!  For those of you new to our blog, I compile a list of 5-10 websites that can be used by educators for student multimedia projects, lesson plans, professional development and more.  Use what you can and push the rest to the side.  You can always come back later if you feel like you missed something.

Don't forget, you can access and search all the sites bookmarked for Website Wednesdays at https://www.diigo.com/user/gwenlehman.  Search by Tags, lists, titles or URLs.
Posted from Diigo. The rest of my favorite links are here.

Tuesday, February 26, 2013

What to do with a snow day!

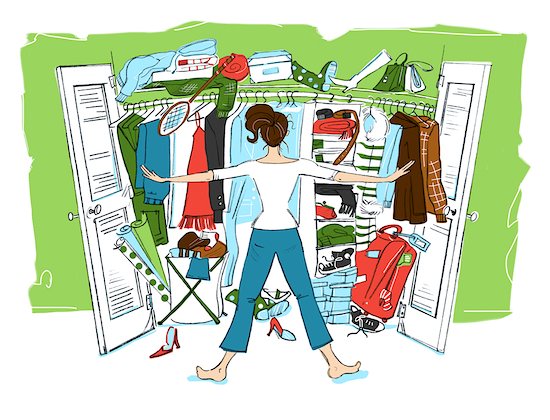
We are into our 4th snow day with a weekend in between!  Ever wonder what educators do on their snow days?  Some will spend time entertaining their children who are also stuck at home.  Some will watch movies, read a good book, play video games and shovel their sidewalk and driveway.  Some will clean their house, cook or bake, and clean out that closet that has been haunting them for months.  A few will get out the computer and write up lesson plans or search for new lesson and classroom ideas to pin on Pinterest.  While an even smaller percent will work on that college class they are taking and try to complete the project that is due this week.

Grandmother's door and window
So, what did this techie do with her snow days?  A little of everything and then some.  I did the basic catching up on daily tasks like cleaning my desk, balancing the checkbook (yuck!), reading the past comics on my Zits calendar and tackling some other items on my to do list.  I played Solitaire and Flow Free on the iPad, read a book - Throne of Glass by Sarah J. Maas - and watched a couple of movies with the family.  I did skip the cleaning house and opted to tackle the laundry instead.  I also shoveled the sidewalk so my Grandmother could open the door to her "apartment" in the basement.  I did keep tabs on email and Pinterest with my iPad, but didn't really break out the computer for some serious work until Saturday.  I started thinking about the number of computer hard drives that have crashed lately on teacher computers and decided it was time for me to do something to protect myself in case this fate fell on me - yes, even techs can have their hard drives crash on them.  So, I decided to start backing up my documents to Google Drive.  Here's what I did:

1.  I started by creating folders to organize my documents.  Like any good organization system, it had to be something that made sense to me.  Google allows you to put folders inside of folders, just like your documents folder on the computer.

2.  I uploaded all formats of documents - Word, Pages, Keynote, pdf, etc.  I also upload images, videos and a few audio files.  While I can't directly open some of these files in Google, I can download them onto my computer - or a new computer if something happened to mine.  I also weeded out any files and documents that I don't need or use any more.

3.  I deleted documents and files from my computer that I don't use regularly or are a pdf format after I uploaded them to Google. This was a personal choice, which allowed me to free up some space on my computer.

After I finished with this project, I moved on to my photos.  While I don't have thousands of photos on my school computer, I do have quite a few on my personal computer.  Since I already have a gmail account, I decided to use Picasa - this is a Google product - to store my photos in the cloud.  I did discover that Picasa with my school email looks different than with my personal email.  I have a Google+ account with my personal email which accounts for the difference.
Picasa with school account

Picasa with personal account


Here's how I got started:

1.  I went to the Picasa website - https://picasaweb.google.com/home

2.  Logged in with my email account.  If you are using a personal account, it will have your sign up Google+ as part of the process.  What is Google+?  In a nutshell, this is Google's version of Facebook.

3.  I clicked on upload, entered the name of my album and did a drag & drop of photos from iPhoto into the album.  This worked in most cases, but I did have a few times when I had to take the photos from iPhoto, put them in a folder on my desktop and then drag them over from the folder to upload them into Picasa.  I don't know why, but as long as I had a work around I don't care about the why.

Since doing this with my photos, I found that I can send directly to a Flickr account from iPhoto.  Here's how:

1.  Open iPhoto

2.  Click on Share

3.  Choose Flickr

4.  Choose set-up

5.  Select login with Google - if you are using your school account or some other gmail account.  If at some point if you want to add another Flickr account, perhaps a personal account, you can go into the Preferences for iPhoto and add another Flickr account.

6.  Once you've authorized the Flickr account to iPhoto - read and follow the instructions - you can start uploading photos.

*Note:  If you have movies within an event, then make sure you go into the event and just choose the photos to upload.

You'll notice that under the 'Web' section in iPhoto, you can access your Flickr and Facebook photo sets.  This will let you see what you have already shared to those accounts.  I must admit that this was a faster process than Picasa.  There is also an option to set-up Photo Stream, but I didn't venture into that area yet.  Maybe on the next snow day!

I finished up with my photos on Sunday and decided it was time to tackle the music.  I don't know about others, but I have more music and audiobooks on my computer than photos.  I think it's because I work better with music playing in the background.  I'm one of those people who would love to have theme music playing as I go through each day.  Sometimes a piece of music does pop into my head and starts playing during certain situations.

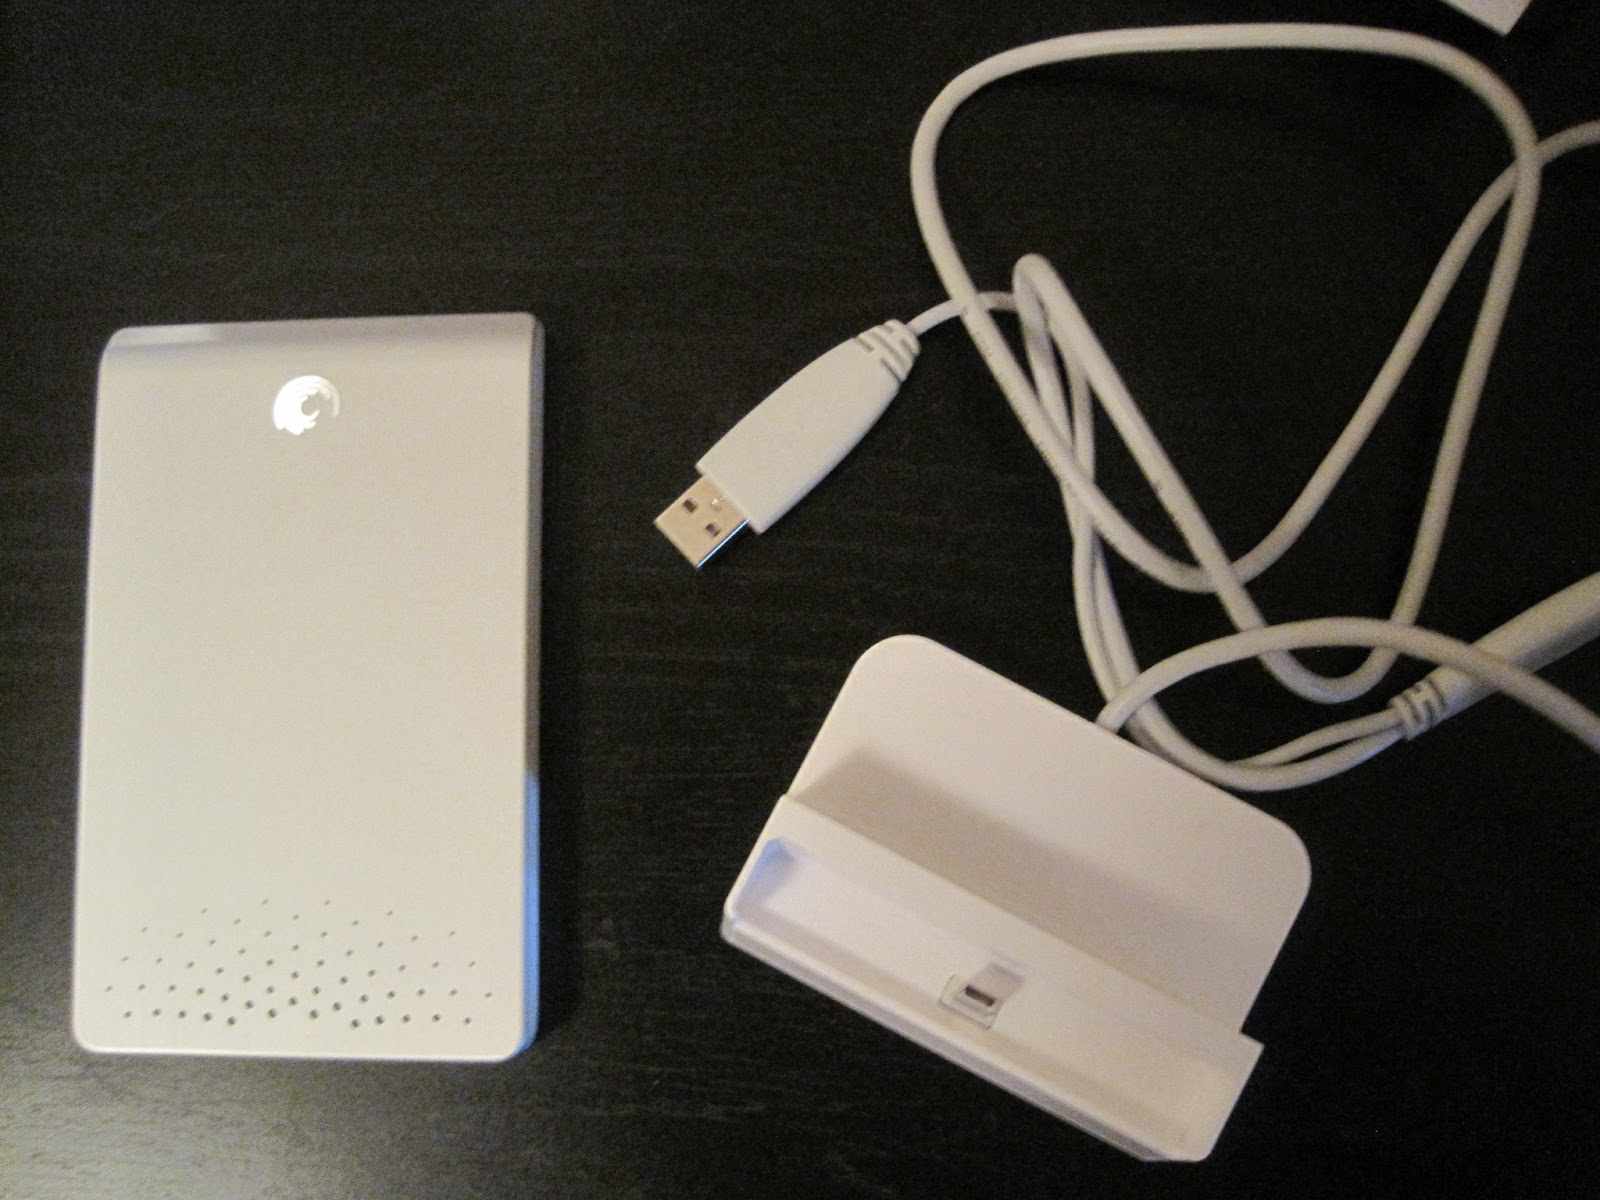
Other than having my music on a mobile device, like the iPod, I don't have a cloud solution for storing my music yet.  So, I depend on a portable external hard drive.  A few years ago, I purchased the Seagate FreeAgent Go Mac 640 GB.  (They don't sell this model any longer, but you could pick up a Seagate Slim Portable Drive for Mac which is comparable.)  I still have over 500 GB of space available and that's after 28 audiobooks, 19 movies, over 3,500 pictures and over 2,400 songs.  That doesn't count all the documents I also have backed up on this device.  If I wanted, I could just use this litte portable external hard drive to back-up all the files on my computer.

Tuesday, February 12, 2013

Google Drive Offline

Google Drive is a get place to create documents, spreadsheets, presentations and more.  With Google Drive you don't have to worry about your computer crashing or not having access to the computer with your files.  You can access your Google Drive files on any computer, anytime.  All you do is log in to your Google Drive account and start working.

That all sounds great until the internet goes down.  Without the internet you can't access any of your files!  This statement would be true if you didn't have Google Drive Offline setup on your computer.

Step one - installing Google Drive on your computer.  Here's how...on a Mac:
    1.  Open your Google Drive account

    2.  Click on Download Google Drive

    3.  Open the installgoogledrive.dmg (It might be in your downloads folder.)

    4.  Open the installation file and drag the Google Drive icon to your Applications folder

    5.  Open Google Drive from your Applications folder (You may receive a warning that Google Drive is an application downloaded from the internet.  Click the Open button.)

    6.  Enter your school email account and password.  This will be the account associated with Google Drive on you computer.

    7.  Launch Google Drive via the icon on your toolbar. 

    *Files must be in your My Drive on Google Drive online.  If they are not in My Drive, they will not sync to Google Drive on your computer.

     Step two - setting up offline access.  Here's how:

    *You can only enable offline access using the Google Chrome browser.

    1.  Click More

    2.  Select Offline Docs

    3.  Click the Enable offline blue button

    4.  Now click the blue button on the right that says Get the app.  If you already have the app installed, you won't need to complete this step.

    5.  You'll be taken to the Chrome store.  Click Add to Chrome in the upper-right corner.

    6.  Once the app is installed, you'll be taken to a Chrome page with the Google Drive app icon.  To return to Drive, click the Google Drive icon.

    Now when that pesky internet goes down, you'll be able to continue working on your documents.  Any files you make changes to while offline will sync with a time stamp when you reconnect to the internet.


    Internet Down image from https://blogger.googleusercontent.com/img/b/R29vZ2xl/AVvXsEhZoriHaU9QLodTGKZPQt1GP_6P7tnvfWT6vjVne_yfspO0msxxRjOKGnt2XRmEPDETNKR0Q0ranFyarHJOb26AxnQNLR6NKXYyu6c20ljIdZyp9uENurzuuSnTm-9I-zh0A00pHLh6R7s/s1600/Internet_down.jpg

     Instructions for installing Google Drive found at http://support.google.com/drive/bin/answer.py?hl=en&answer=2375078&topic=2375002&ctx=topic

    Instructions for setting up offline access found at http://support.google.com/drive/bin/answer.py?hl=en&answer=2375012&topic=2375002&ctx=topic

    Friday, December 21, 2012

    Do you Flubaroo?

    Photo courtesy of http://www.johawk.com
    Flubaroo - it sounds like a new dance move or some scientific experiment like Flubber, but really it is a script you can add to any Google Form so it will automatically grade a form quiz or test.  Imagine having your final exam graded as soon as the student hits submit.


    *Please note that any short answer questions will need to be graded separately and not by Flubaroo.  However, fill in the blank can be scored by Flubaroo.


    Checkout the full instructions on installing and using Flubaroo at http://www.flubaroo.com/flubaroo-user-guide

    Tips on using Flubaroo & Google Forms:
    • Make the first question of your form Student Name OR First & Last Name.  When you complete the form to create the answer sheet, you can enter Answer Sheet in the first question so you know which one has the correct answers.  It will also allow you to sort the responses by student names.
    • You can shut the form off by unchecking 'Accept Responses' under Form on your form spreadsheet.  This will stop students from taking your quiz or test until you are ready.
    • If you are using this form for multiple classes, include class hour as one of your questions.  This will help with the sorting process.
    • Make sure you have students submit their answers on the live form, not the spreadsheet.
    • When using the 'Choose from a list' question, make your first list option ' Choose from the list below.'  Without that option, students will think the answer is already given for them and will not click on the drop down arrow for additional answer choices.

    Monday, May 21, 2012

    What I like about Google Drive

    If you've used Google Docs recently, you may have noticed the following message:

    Google Docs will be switching to Google Drive soon, but you can click on the get started link now.  There are a few differences between the look of Google Drive and Docs, but not much.  Below is a video explaining those differences:

    I just made the switch myself today and here is what I like so far (they are not in order of importance):

    1.  Docs shared with me, show me a picture of the owner on the document.
    2.  I can upload files from my computer through the Google Drive icon on my computer and I don't have to open up the internet.
    3.  When I'm working on a document, I can add or change the folder location right in the document.
    4.  I can look at my docs and collections in a visual layout rather than a list.
    5.  I can search for documents by their file type.
    6.  Under the create options, I have a more section that lets me choose from SlideRocket and Lucidchart Diagram (2 new apps added this year that associated with our Google accounts).
    7.  They changed the name from Collections to Folders!!!!!

    Finally, for those of you who like shortcuts, here are the keyboard shortcuts for Google Drive: