Showing posts with label tech integration. Show all posts

Thursday, December 11, 2014

Out of My Comfort Zone at TIG

I just attended the Tech Integration Group last week and participated in some activities that are outside of my comfort zone.  Of course, anything that involves a photo of myself is out of my comfort zone.  So here are some of the activities and learning that occurred last week.

Creating Timelines:
We started out exploring tools, web-based and apps, that could be used for creating Timelines.  I started with Tiki-Toki which I've had in my "Try It" list for about a year.  As I started working with this web-based tool, I found that I couldn't upload photos from my computer.  They had to be hosted somewhere online like Facebook or Google Drive.  I also found that my free account was limited to creating only one timeline.  However, the real drawback for me was this tool just wasn't intuitive.  While there were tutorials I could have watched, I was looking for a tool that I could just mess with a little and figure it out.  If it takes me more than 10 minutes to get a web tool or app to work for me, I'm usually done.  There must be a good reason for me to stick with it and figure it out or breakdown and the watch the tutorials.  I set that guide for myself because I'm looking for tools that will be quick and easy for teachers and students to use in the classroom.

So, I dumped that tool and moved over to Dipity.  It was easier to upload photos and add text to my images.  Sadly, the free version is also limited to three timelines and 50MB of photos to upload.  However, you could delete timelines you didn't need any longer so you could create a new one.  You can embed your timeline or share it via a web link.  You can also share it via Twitter and Facebook.  You can share your timeline as a timeline, flipbook or list depending on your desired look.
http://www.dipity.com/socdownload/Summer-Tech-Training/#timeline
Some of my colleagues used other web tools and apps to create their timelines:  Capzles, Thinglink, Tackk, Visme and Popplet.  We also talked about the idea of creating a timeline with Prezi, Animoto and the READTHINKWRITE timeline.  Some of these do give you the actual look of a traditional timeline, but some of them do not.  If you were having your students create a timeline, you would need to decide if that traditional look is important as part of the lesson or not.  While I haven't tried all these other options out, here are some samples from my colleagues.

Visme - http://my.visme.co/projects/-fc0b3b
Capzles (photos only) - http://www.capzles.com/#/88a1f951-c77e-4744-a228-2994c9174009
Capzles (text only) - http://www.capzles.com/#/d43d224c-bd15-44c4-b4cd-9b9aff10cc62
Popplet
We did spend time during the day talking about Game-Based Learning and Coding with Students, but I am writing separate posts on these two topics as I have several links and resources to share on both topics.  Be sure to check out those posts.

Selfies in the Classroom?
The "Out of My Comfort Zone" moment came when one of the gals pulled out the book 101 Comedy Games and said we were going to do a "fun activity."  (I don't know about other people, but for me that means we are going to do something I deem as embarrassing.)  So, we were instructed to partner up and take selfies of each other making the facial expression that was read to us from this book.  The faces include things like...

  • Swatting a bee from your face
  • Trying to show emotion after having Botox
  • An Elvis impersonation with the sneered lip
  • A fish face
  • Someone just drove over your foot
  • And more

When we finished taking the photos, we created a photo collage (using any app of our choice) to share our selfies - or rather the selfies of our partner.  We then emailed them to our "teacher" so we could see everyone's collage.  I would share a sample, but we took an oath not to post the photos on social media.  Naturally we discussed how you might use selfies in the classroom.  With this activity, I instantly thought about drama class and practicing facial expressions.  Some other ideas included:
  • Sentence Selfies - Take a selfie expressing the different type of sentences (exclamatory, interrogative, declarative, imperative)
  • Life Story Selfies - Tell someone's life story through facial expressions.  You could use this with a historical figure, fiction character or yourself (as an introduction)
  • Action vs Passive Verb Selfies - Check student understanding by having them take selfies expressing action and passive verbs.  They could put this in a collage identifying the verb types.
  • Opposites Selfies - Have younger students take selfies of word opposites, like hot/cold, tall/short, etc.
  • Reflection Selfies - Students could create a blog post using selfies to share their reflection related to an assignment or project they just completed.  The writing comes in explaining why they felt the way they expressed in their selfie.
I'm sure many of you have other brilliant ideas on how to use selfies in the classroom, so please share in the comments section at the end of this blog post.

We did take the selfies concept a little further and created group selfies.  As a group, we got to choose a favorite Christmas song and create it in a group selfie so others could guess the song title.  Can you guess our songs?

https://www.youtube.com/watch?v=FYT_0f_ZfLk
https://www.youtube.com/watch?v=_nYopnZ9Y7g
https://www.youtube.com/watch?v=5BRVkgaIcaE
This activity would be a fun way for students to recreate a piece of art, a scene from history, or scenes from a short story or book.  The variations of this project are numerous, but here is one option.

My class is studying Edgar Allan Poe and reading a variety of his short stories.  So, I break the class into small groups (about 4-5 students per group) and each group signs up for a short story.  As a group the students recreate the significant scenes from the story so they can retell it in photos.  They can use props they bring in or make, but they can also have a person be an inanimate object in their photo; for instance, the cat from "The Black Cat."  (I wouldn't give them much time for creating props, maybe a day.  They could do part of this as their homework and bring the props in the next day.)  Once they have their photos taken, they will put them together in any format - comic book, eBook, movie, animated slideshow, or any other teacher approved format.  My students might opt to use one of the following creation tools:  Prezi, Tackk, Book Creator, iBook Author, Comic Life, Story Me Strip Design, Animoto, Puppet Edu, Google Slide, Haiku Deck, iMovie.  Of course, they can use any other tool that will help them meet the requirements for the project.  I would provide them with a rubric and a planning sheet.  In fact, they don't take photos until I approve their planning sheet.  We would also have a preview day to view and peer edit the products, followed by a revision day before the final product was submitted.

As I stated, this is just one example.  Any ideas churning for you?  If so, please share in the comments below.


Wednesday, October 23, 2013

Primary Sources? What is that?

A map of Philadelphia and parts adjacent from the Library of Congress
At the start of this month, I attended the Tech Integration Group at Essdack where we covered Primary Sources in Social Studies.  Several teachers asked me to share out what I learned and any resources.

Before I delve into what I learned, I want to get everyone on the same page with a definition of primary sources.  A primary source is an original document or physical object written or created during the time period being studied.  Primary sources include speeches, journals/diaries, news film footage, letters, interviews, official records, clothing, pottery, art, music, novels, etc.  More specific examples of primary sources include:

  • The Constitution of the United States
  • Diary of Anne Frank
  • Photos of 9/11 - the day of and immediately following
  • News footage of the Kennedy Assassination
  • Audio of the "I Have a Dream" speech by Martin Luther King
Historians also refer to secondary sources, which provide an interpretation and/or analysis of a primary source.  This includes textbooks, criticisms, encyclopedias and commentaries.  Magazine articles can become a confusing source, but the best way to decide if it is a primary or secondary source is to ask if it is an interpretation or review of the event (secondary source) or a first-hand account from a participant or observer of the event as it unfolded (primary source).

Primary Source Sites:

At the TIG session, Glenn Weibe presented several activities for using primary sources in social studies.  One activity involved two maps taken from Google Earth of the same area, but different time periods.  We didn't know anything else about the maps and were asked why the difference between the two photos.  However, we first had to determine which photo came first and how did we know that.  After several decoding attempts related to the two photos, we were told what happened which then tied into the actual historical event and a novel study.  Another activity had us in groups and each group was given a quote.  Based on the quote we had to move to one side of the room if we thought the person was racist and the other side if we didn't think they were racist.  Of course we did't learn until later in the activity that the groups had different quotes and the quotes were all said by the same person.  The activities themselves really made us think and process the source we were examining.  With the new common core, the ability to analyze and synthesize information becomes more important than names and dates.  While a general knowledge of what happened when is essential, the ability to evaluate and analyze why events happened is crucial.  Primary sources become a key tool in making students work to determine their response.  Glenn shared the links to his presentation and resources, although I noticed today that his presentation has changed some since our meeting.


Here is the original presentation:

Here is the new presentation:

Additional resources from Glenn Weibe:
Using Primary Sources in the Social Studies Classroom
Social Studies Central
History Tech Blog
Weekly Tip

If you haven't looked at the primary sources on the Library of Congress website, you are missing out on a plethora of teacher guides and tools for teaching with primary sources.  They also have specific primary source sets centered on topics like:
Oakland, Calif., Feb. 1942 from the Library of Congress

The site also has Teacher's Guides and Analysis Tools providing a template and suggested questions for having students analyze various types of primary sources.

As a former English teacher, I used primary sources to help the students understand the time period prior to reading a novel, short story or poem.  It helped the students visualize and analyze the piece we were studying.

Thursday, October 10, 2013

Come Play with Technology

As many of you know, I've been taking 2 teachers with me to the Tech Integration Group at Essdack this school year.  It is an opportunity for teachers to "come play with the big boys."  (It really should be come play with the geeks, but I've always wanted to say the other.)  This group explores technology - new web tools and apps, technology techniques like augmented reality, ideas for incorporating technology in the classroom and more.  Below is a little more information about this technology opportunity including future dates and topics for 2013-2014.

I have already taken several teachers this school year and asked them to share about their thoughts and experiences from the day.

During Friday's Tech Integration Group, I learned some helpful tips for integrating technology into my Social Studies classroom using primary documents such as maps from Google Earth. We did an interesting activity comparing maps from the same location during two different periods in history. The activity required us to use critical thinking skills and come up with reasons for why the maps were different as well as which one was the earliest. I can't wait to use that same idea in my classroom! - Sandie Raper
I really enjoyed the day. I think what I learned most is to appreciate the thoughtful and deliberate decisions made by our tech department. I also learned that I can explore new programs without trepidation. Today I learned how to network with other educationally minded people in order to share ideas. I was happy to have the time to "play" around with edmodo, and I feel confident in introducing the program to my students next week. However, most of the students are probably aware of it if they have taken classes from Mrs. Fitzpatrick, Mrs. Wilcox, or Mrs. Schmidt. I also look forward to creating new projects in my English classes that may reach reluctant learners. - Janet Fleske
I learned about several new apps for the ipad. Shadow puppets and Tiny Scan were two that I thought would be helpful in my classroom. We also had a guest appearance from Glenn Wiebe. He showed us several ways to use primary sources such as pictures, quotes etc. He also showed several different ideas for lesson plans using Google Earth. We then went to his website which has all kinds of websites, tools and ideas to implement. He explained to us what the new social studies standards would be like and how the kids were going to have to use Historical thinking to be able to answer correctly. We were then given time to play around on these resources and try to figure them out and get experience on them. - Stephanie Bauer
Attending the technology PLC, I was not sure what to expect to begin with. I really like the sense of community that is developed with the goal of focusing on technology and the incorporation of technology in the classroom. The ideas that are brought up and the questions are great for improving technology in schools, as well as the different problem/ solutions that the different districts are facing. 
I feel that our district is ahead of the game compared to other districts. I’m thankful for the technology connections that our district has and the ability to explore different educational tools. I was surprised by the fact that some district can’t have google apps or other technology things that our district has. I also feel that our district is ahead of the game with teachers starting to use more and more technology all the time. 
When the guy from Mcpherson College talked, he said that things students learn need to be concrete and tangible student improvement. I think this is very true of education, how can we engage students so the content they are learning is concrete and tangible to them. - Joy Schmidt
If you have not had the opportunity to take advantage of one of these technology days, look through the dates and topics below.  Find one that peaks your interest and send me an email to reserve your spot!


Wednesday, April 10, 2013

Choosing the Right Tool

photo credit: fixedgear via photo pin cc
When preparing to fix something around your house or on your car, you always check to see if you have the right tools for the job.  I recall the first home remodeling project I started in my house.  The computer room was covered in wallpaper that had been drawn on with pen and marker by the children of the previous owners.  So, it was decided to remove the wallpaper and paint the walls.  Of course, I got on the internet to look for easy ways to remove to wallpaper.  Several home recipes later, I found myself slowly winning in the wallpaper removal battle.  Before tackling my second wallpaper removal job, I purchased a small wallpaper steamer.  That little steamer and I got the job done in a few short days.  The tool made all the difference!

The same is true when working with technology.  There so many cool hardware and software tools to try out that when it is time to choose one for a class project with your students it is hard to make the best choice.  Here are a few questions to ask yourself when deciding on a tool:

1.  What are the objectives of the lesson? - Will the tool enhance or improve instruction?

2.  What are the objectives or purpose of the project you are having your students complete? - What knowledge should students gain through the project?  Will the tool you choose help students apply the content and learn new material?

3.  How the end product will be shared? -  Is it a stand-alone piece?  Is it a visual add for a speaking presentation?  Will it be published online?  Is it on an iPad and you want to move it to the computer or publish it online?

4.  What type of learner are your students? -  Are they good in front of a camera?  What level of technology skills do they have?  This doesn't mean students shouldn't step out of their comfort zone and try new tools, but maybe you can give them a few options so they can choose one that seems less threatening to them.

5.  Is the tool accessible? - Does the tool need to be purchased?  Does the tool require you to create an account?  Does the tool work on the student filter?

Here are a few final points not to forget when working with technology tools:
1.  Provide students with getting started instructions for the tech tool(s) you are asking them to use.  You don't have to show them all the advanced features because they will figure those out as they go or from their peers.

2.  Allow students time to learn to use the tool.  Before they use the tool on a major project, create a small project for them to use that tool.  One teacher introduced her students to Glogster and had them create a fact/opinion Glog for their first project on Glogster.  Later they used Glogster to create a book report (see samples).  The first assignment helped the student learn the tool and it helped the teacher work out issues with the tool relating to the filtering system.  It made the book report project run smoother and the students produced better projects.

3.  Allow for peer editing.  Sometimes we forget that a technology project is no different than a written Kathy Schrock's Guide to Everything.
essay.  We take time in class for peer editing on essays, but we don't think about that option with a tech project.  Allow one day in class for students to present the content of their project and obtain feedback on how to improve the product.  There are some great rubric templates for technology projects at


Tuesday, February 19, 2013

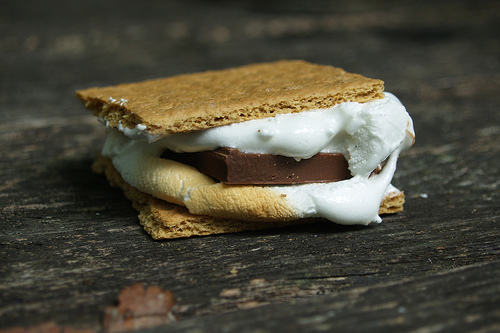
S'more - not just for eating

When I hear the word s'more, I visualize those great chocolatey, gooey campfire delights.  As you enjoy this mountain of decadence, the heated chocolate drips out and the marshmallow oozes out burning your finger from the heat.  But you savor every bite.  When it's gone, you make another because you only get to enjoy this treat around those late night summer campfires.

On this winter day, my heart was elated to find another s'more.  It might not be ooey, gooey, chocolatey, but it's still a great treat to explore!  Smore is an online flyer creator that can publish your flyers instantly via Facebook, email or embedding to a website or blog.  When you create your flyer, you can add text, photos, videos and audio.  You can choose from various design backgrounds and colors.  The most difficult element in creating a flyer is deciding what you would like to say.

The following video will walk you through a short tutorial on using smore:


Here is a completed smore flyer:


S'more photo by Colin Purrington http://www.welovedc.com/wp-content/uploads/2008/12/smore-by-colin-purrington.jpg

Ideas for using smore in the classroom: 
  • advertising school or class events
  • creating book reports
  • creating profiles on historical figures
  • making an order of operations poster
  • explaining the food chain or water cycle.

 
Create your own smore and share the link OR share how you used smore in your classroom!

Thursday, February 7, 2013

You're a 21st Century Teacher if...

Friday, I spent the day at Essdack with my Tech Integration Group.  They are an awesome group of people who share their expertise, ideas and inspiration.  One of the topics we focused on was the 21st Century Teacher.  A site called Simple K12 posted a list of 21 Signs You're a 21st Century Teacher.  The tasks are things you already do in your classroom, but then took it to the next level with the connection to technology.  After reading over the list, we voted on the top 5 items through Google Moderator.  (Google Moderator allows you to post topics or ideas that people can vote up or down.  We use this each month to decide on the topics we will cover at our meetings.)  From there, we took the top 5 items and created Wallwisher boards for each topic.  We then spent time adding ideas, tools and suggestions for supporting teachers to get there.  Here our boards and suggestions:


http://wallwisher.com/wall/97lhhagh7o


http://wallwisher.com/wall/llaqcd8lh7


http://wallwisher.com/wall/nmvjjbqy99


http://wallwisher.com/wall/g9gvffjham


http://wallwisher.com/wall/issvht25m0

These boards are still being added to, but they are a good starting place.  Personally, I had used Wallwisher in the past, but wasn't a huge fan.  I started using another tool, Lino, which was like Wallwisher.  Both are electronic bulletin boards centered around a specific question or topic.  Then you open the board so others can contribute resources to the topic or answer the posted question.  Either tool would be great for exit questions, brainstorming for a project or paper or collecting online resources centered around a topic.  I could see using this as part of a web evaluation activity.  The students have to find a reliable website related to a specific topic everyone is researching.  They could give the link and explain how they know it is a reliable site.  Here is a sample Lino canvas I used this summer during one of our training sessions:


After working with the new Wallwisher, I'm going to give it another try.  Although Wallwisher doesn't have an app for the iPad, I can still go to the internet on the iPad and use Wallwisher to create new boards or respond to boards.  Tom Barrett has a slideshow showing several interesting ways to use Wallwisher in the classroom.  On his blog, Sean Banville provides 105 ideas for using Wallwisher in the classroom.

So, are you a 21st century teacher?  Are there any signs that you use in your classroom already?  Do any of the signs inspire you to try something new in your classroom?

Tuesday, February 5, 2013

Components of a 21st Century Classroom Infographic

Here's some food for thought:

Click link to see full view - http://www.opencolleges.edu.au/infographic/media/21st_century_classroom.jpg

As I looked over the stats, I was surprised by the integration of social networks and the 29% to 80% ratio between public teachers and college professors.  I'm not surprised by the use of social networks, but I'm surprised by the percentage difference.

Do you agree with these statistics?
What areas surprised you?

Monday, February 4, 2013

Common Core, Effective Instruction and Techonlogy with Glenn Wiebe

On January 21, 2013 Glenn Wiebe spent an afternoon with our staff talking about the connections between common core, effective instruction and technology.  As he began, Glenn stated that, "Change is hard and sometime hard to see."  He shared samples of various common core standards and the key words being used to indicate the use of technology.  Some of those key words included digital tools, digital media, text read aloud, digital sources, multi-media and other media.  I found this interesting because sometimes as educators we read just like the students.  If it isn't stated in black and white, then it is not implied.  So, if the standard doesn't say 'use technology to...' we assume technology is not a part of the standard.  However, the simple phrase 'text read aloud' can imply the use of technology.

Glenn also spent some time sharing Google Earth.  He called it the ultimate "Swiss Knife" of technology.  Google Earth is available on all student and teacher computers.  It is also available for use on the iPad, but has some limited features.

Here are some resources for obtaining lesson plans and ideas for using Google Earth in the classroom:
Classroom Resources:  Lesson Plan Library
Google Earth Lessons - Provides lessons for actually using Google Earth as well as student and teacher controlled lessons
Teaching & Learning with Google Earth - Lessons are grouped by primary level and secondary level
Google Earth for Educators:  50 Exciting Ideas for the Classroom - Find lesson plans and virtual tours for various grade levels
Google Lit Trips - Use these trips to follow the journey of characters in famous literary and bring a new level of engagement to your students with photos and questions centering about various aspects of the novel
Google Earth - Wiki with various resources and samples
Google Earth Education Community - How-to helpers for Google Earth and links to Google Earth lessons

Need help understanding how to work with Google Earth?  Check out the print and video resources at http://support.google.com/earth/bin/answer.py?hl=en&answer=176576&ctx=cb&src=cb&cbid=-1hedy4f7grmjn.

Later in the afternoon, Glenn shared some great Google search strategies that will benefit teachers and students.  They are the 2M List, quotation marks, title, site and file.

2M List - You add the words that must be on the site and put a minus in front of words that must not be on the site (columbus -college -university)


Quotations Marks - Put your search phrase in quotation marks to get that exact wording.  This is a great way to check student writings for plagiarism.  If some wording doesn't sound like the student, then put that phrase or sentence in quotation marks for a Google search.  If it was copied from the Internet, it will show you the source.


Title - If you need a particular word or phrase to be in the title of a website, then type intitle: and your word or phrase in quotation marks.

Site - Use site:site type (edu, com, org, net) and your term to narrow your search results. 

Site Types:
.com - used for commercial purposes, usually by corporations and businesses
.edu - used by educational organizations
.net - used by internet related companies, but also used by all types of businesses
.org - used by organizations, usually nonprofit like Red Cross

*You can also search by country site.  For example, .us is for United States and .uk is for United Kingdom.

File - Search by a specific file type like powerpoint by using filetype:ppt and then your search terms.


Possible File Extensions:
.gif OR .jpg OR .tiff - images
.doc - documents
.ppt - powerpoint
.mpg OR .mov - movies
.pdf - portable document files

Glenn ended our time by talking about Visual Discrepant Inquiry.  In simplest terms, you give students part of an image and ask them to tell you what the photo is about - time, place, overall content or focus of the image - from the portion they can view.  Slowly you reveal more of the image and have students continue the investigation of the photo.  The key element that reveals the significance behind the image isn't revealed until the end.  Glenn explains the process in more detail in this article - http://historytech.wordpress.com/2009/02/27/tip-of-the-week-visual-discrepant-event-inquiry/.  It was an intriguing activity and not hard to duplicate with Keynote or Powerpoint and a projector.

Throughout his instruction, Glenn also provided staff with time to explore various web tools he introduced throughout the afternoon.  In our district, some of the sites are only available to staff and some have been opened up for student use.

Research
BibMe - Create a bibliography for your works cited.  We also have EasyBib available through Google Docs which not only allows students to create an MLA formatted works cited, but it then downloads right into Google Drive.

ReadLists - A group of web pages - any type - bundled together in an eBook format.  Here's a sample


Shmoop - Provide learning guides, homework helpers and test preps for anyone wanting to learn.  Shmoop also provides indepth literature analysis for those complicated text.  Resources are available in Spanish.

KeepVid - (only open to staff)  Download videos from the web onto your computer to prevent issues with buffering.  This works great for those YouTube videos you want to show in class, but stall out from the buffering.

Readablility - Turns a web page into a readable document that you can save for later once you create a free account.  Good for those great articles you stumble upon during the day, but don't have time to read in depth.  Save it to Readability and read the articles as time permits.  You can get the Readability app for your Android,  iPad, iPod or iPhone.

Evernote - Set-up a free account to save your notes (text and audio), webpages, lists and more.  Evernote is accessible and syncs your account on the computer, website and mobile apps.  Great tool to use when researching on the internet.  You can get the Evernote app for your iPad, iPod or iPhone.

ThinkFinity -  (only open to staff)  Use the search box on the right-side of the home page to search for lessons based on standards, grade level and content area.  If you are trying to search by Common Core standards, scroll past all the regular state standards - the common core are listed below the regular state standards.

Advanced Google Search - Use the advanced tools when searching in Google.  This will help you narrow your search and obtain the information you are seeking without wading through millions of web sites.

Critical Thinking
Google Earth - This program allows you to take a virtual journey of the globe.  You can explore terrain, 3D buildings and more.  Resources for Google Earth were provided in the beginning of this post.  This program is available on every staff and student computer in our district.

YummyMath - Get ideas for bringing real-life into the math classroom.  Searchable categories include Algebra, Number Sense, Data & Probability, Geometry and more.

Google Earth Math - Provides Google Earth math map lessons for use in the classroom.

Visually - Search for infographics to enhance your curriculum in the classroom.  You can also create your own infographics at this site.

Infogram - Create interactive inforgraphics and charts for the classroom OR have students create an infographic to share stats and content.  Create an account for free.

Common Core
Diigo:  Glenn Wiebe Common Core - 40 website links centered around common core

Diigo:  Common Core - 578 sites that have been tagged as common core

Collaboration
Google Drive - Share and collaborate in real-time, create documents, presentations, spreadsheets and forms, and store various file formats, photos and videos.  Every staff and student in our district has an account to access Google Drive.

My Big Campus - Engaging online environment for your classroom.  Share assignments, tests, slideshows and other resources to students whether they are in class or not.  Our technology department is exploring this venue to replace Blackboard.

Dropbox - Store and share your documents, photos and videos.  Not as user-friendly for collaboration.

Communication
Ted-Ed - Videos that can be used to enhance your current curriculum or to be viewed by students as homework in preparation for the upcoming lesson.  You access resources to dig deeper and some videos provide questions to get students thinking about the content they viewed.

Little Bird Tales - Use this tool to create, record and share online stories.  Check out the demo video below:


Celly -This is a group messaging and communication service you can use via a cell phone or web browser.  Check out the Celly for Schools Set-up Guide and Celly for School for ideas on using Celly in your school and classroom.

PrintFriendly - Use this tool to print only the text on a web page.  Just copy the URL, go to PrintFriendly and paste the URL in the box.  Hit return and wait for your PrintFriendly view to appear.  You can remove any text from your new document before hitting print.  This will save you from printing those worthless blank pages.

Slideshare - Store and share your slideshows and pdf files through Slideshare.  Once uploaded, you can embed your files and slideshows on a website or blog.  You can view and use slideshows shared by other people.  Great way for students to share their presentations in real-life.

Socrative - Engage students in games, polls, quizzes and tests through Socrative.  It is similar to using a clicker system, but students can respond via the Socrative student app available for iPad, iPod and smart phones.  Students can also respond via a web browser on the computer.  The main Socrative website is blocked by our district filter for students, but they can access your classroom by using the following URL - http://m.socrative.com/student/#joinRoom.

Below are additional resources from Glenn's Presentation:

Social Studies Central - Links to all of Glenn's handouts, presentations and web sites.


Wednesday, December 5, 2012

Thinglink in the Classroom

A while back I introduced the web tool Thinglink, a site for creating interactive images (see the intro post on ThingLink).  Today I stumbled on a great presentation shared by Donna Baumbach that gives you 49+ ways to use Thinglink in the classroom.  Check it out!


Any ideas jump out to you?

Friday, September 14, 2012

Increasing Student Participation

I came across the following article the other day and as I read through the ideas, I found that some of them were perfect for integrating technology in the classroom.

http://www.teachhub.com/top-12-ways-increase-student-participation


For example, one of the solutions is to have a question box for the students.  You could have the traditional paper/pencil approach or you could use lino, an electronic bulletin board where collaborators can add sticky notes to the board.  You could create a board for the class or a specific topic and have students attach a sticky with their questions.  You could also use this for quick response answers from your students.

Another idea that came to my mind related to the KWL chart.  This year through Google Docs, we have access to Lucid Chart.  This online tool allows you to create mind maps, flow charts, venn diagrams and more.  You can then share the chart so others can write on the same chart.  As a teacher, I could create a KWL chart for a new topic, share it with the students and have them fill in their responses.  I could then project the chart so we could quickly see everyone's responses and discuss the common ground we all share and the questions we want need answered or clarified.

One final idea, relates to the idea of group work and the students presenting information to each other.  Traditionally, the students would have created a slideshow of some sort to present their information to the class.  This was a good start, but usually one student did all the work on creating the presentation because they could all work on the same document at the same time.  With the introduction of collaborative tools, students can now share the work load.  Google Docs offers a presentation tool that would allow students to work on their slideshow all at the same time.  Gone are the days of one student typing in all the information.  Now everyone in the group can add their contributions at the same time.