Ten Reflective Questions to Ask at the End of Class
Provides
some basic observations about reflection along with 10 reflective
prompt questions you can use with your students or for yourself. Great
questions for wrapping up the day, a project or a lesson.
5 Free Tools for Creating Whiteboard Videos
These
whiteboard video creation tools are great for those exploring or
working with the Flipped Classroom. They are also a great way to create
concept videos to share with parents and students as homework helpers.
Tool recommendations from FreeTech4Teachers.
Google Tools for Science & Math
Includes Chrome Extensions, Google Doc Add-ons, Graphing & Calculators, and Google Drive Apps connected to Science and Math
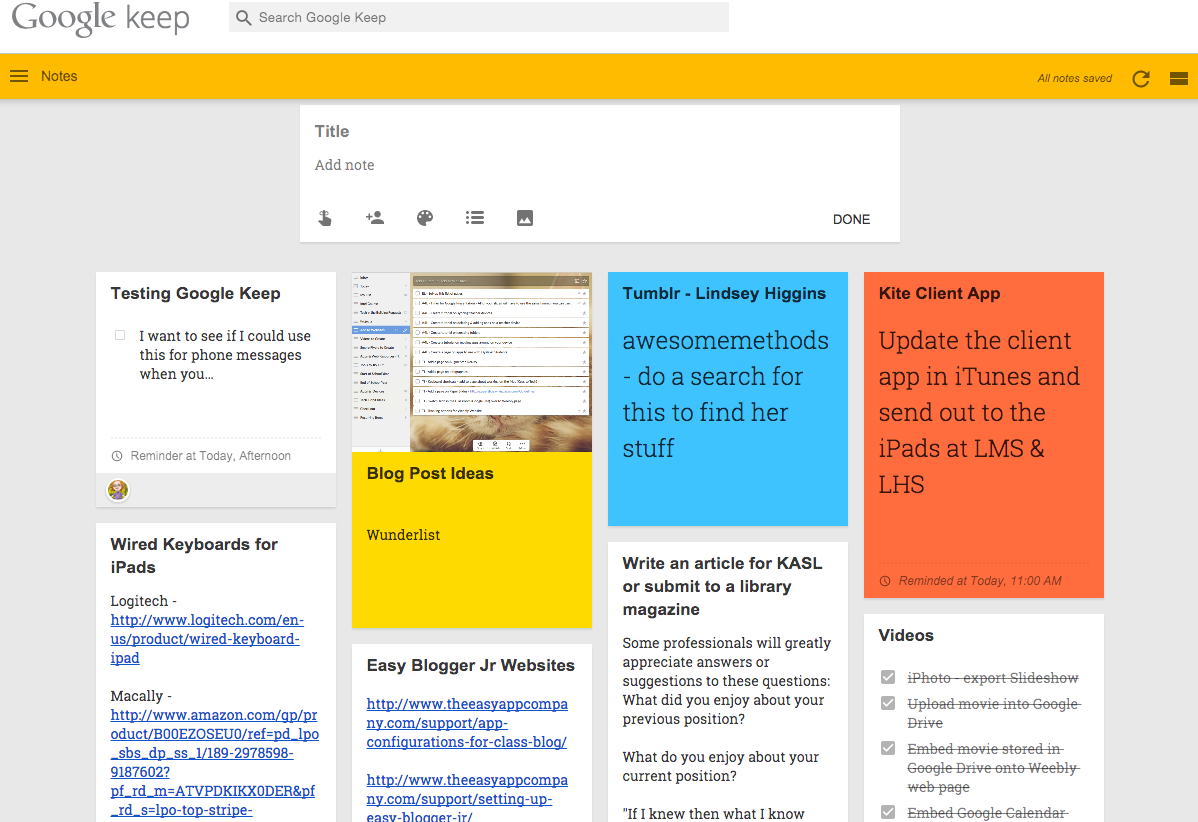
Last summer, I came upon a new tool called Google Keep. I liked it better than stickies because I could access them on any computer, but the features were limited and I couldn't access them on my Apple devices. Just this week I discovered that Google Keep has an Apple app and I've been taking a fresh look at this tool. Here's what I like about this tool:
1. It's free! Who doesn't love free resources?
2. It's tied to your Google account. You know what that means? No additional username and password to remember! Because we are a GAFE district, students can also use this tool for reminders, notes and checklists. This becomes the perfect digital agenda for students.
3. Color!!!! I'm all for using a variety of color! Google Keep allows you to change the color of your notes. I like to use this as a means of organizing my notes. For example, red notes relate to my website, green ones are informational reminders, and teal notes relate to the Intel Courses. Students could use different colors for different classes to help them stay organized.
4. You can change notes from a regular note to a checklist with one click. This is great for projects or daily to-dos, especially for those of us who like to see what we've accomplished and what is left to complete.
5. You can add reminders on your notes by clicking the reminder icon (finger with a string tied on it). Customize your desired date and time on your reminder and you are all set to receive notification reminders. No more missed deadlines!
6. With a simple drag & drop action, you can rearrange your notes and put them in any order that works for you.
7. You can search and filter your notes by words, color, sharing, lists, images, and more.
8. You can add images and websites to your notes. This would be great for collecting images and websites for a specific lesson, unit or project. You could also take a photo at a workshop of a key slide or information being presented and add it to a note. Students could take a photo of the work for the week if their teacher posts it in the classroom. This feature would also help students keep track of online photo locations for images they use on a class project.
9. You can share notes with other people by clicking on the share icon. They will receive an email message with a link to the note. This would be great for sharing project responsibilities or sending out assignments to students.
10. There is an app! Android users have always had a Google Keep app option for their devices, but until recently Apple users had to just use the Chrome web browser on their devices. Now you can see you notes and receive notifications on the go by installing GoKeep. App Drawbacks - too many ads and no search or filter option! Hopefully that will be an upcoming update. There is an alternative app option called TurboNote for Google Keep. You still have ads at the bottom of the screen, but they are not popping up over the top of your notes.
Some additional tidbits:
You can download the Google Keep app onto your computer from the Chrome Web Store.
There is a Google Keep extension - Category Tabs for Google Keep - that allows you to assign specific categories to your note colors. However, there are some glitches with filtering the colors.
This app runs offline!
Check out this video for a quick visual tour of this tool!
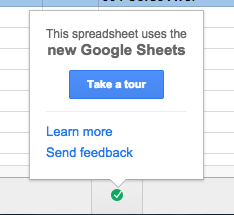
If you've worked on one of your Google spreadsheets recently, you may have seen this message:
According to Google, you can tell if a spreadsheet has been created with or upgraded to the new Google Sheets if there is a green checkmark at the bottom of your document. When you click on the green checkmark you will be able to take a tour of the new Google Sheets. If you take the tour, you will discover that you can now edit your spreadsheets offline, scroll through them faster, utilize advanced formatting and more.
The process of updating your old spreadsheets to the new Google Sheets requires no action on your part. Google has already started making this transition and anticipates the switch to be completed over the course of next year (2015). Not all spreadsheets will be updated at the same time, so don't be surprised if some of your spreadsheets are update and others are not. Google assures their users that no data should be affected in the updating process, but some formula results may be slightly different. More specifically, the adjustments in formulas should resolve previously reported problems and bugs thereby improving the formula behaviors.
While you cannot revert an updated spreadsheet back to the old version, you can manually update your spreadsheets to the new version of Google Sheets. Just follow the instructions in this article - Moving spreadsheets to the new Google Sheets.
If you would like to read more about the new Google Sheets, read this article posted on the Google Help site - Check out the new Google Sheets.
This site provides educational resources for teachers and students. As you scroll down the page, you will find pages for researching dinosaurs, the rain forest, inventors and more. You will also find printable graphic organizers, maps and more. Many resources are free, but there are some that require a membership to the site of $20 a year.
A tediously accurate map of the solar system, but it gives students a new perspective on the distance and size of the solar system. The little quips between planets are fun too.
Google Drive is a get place to create documents, spreadsheets, presentations and more. With Google Drive you don't have to worry about your computer crashing or not having access to the computer with your files. You can access your Google Drive files on any computer, anytime. All you do is log in to your Google Drive account and start working.
That all sounds great until the internet goes down. Without the internet you can't access any of your files! This statement would be true if you didn't have Google Drive Offline setup on your computer.
Step one - installing Google Drive on your computer. Here's how...on a Mac:
1. Open your Google Drive account
2. Click on Download Google Drive
3. Open the installgoogledrive.dmg (It might be in your downloads folder.)
4. Open the installation file and drag the Google Drive icon to your Applications folder
5. Open Google Drive from your Applications folder (You may receive a warning that Google Drive is an application downloaded from the internet. Click the Open button.)
6. Enter your school email account and password. This will be the account associated with Google Drive on you computer.
7. Launch Google Drive via the icon on your toolbar.
*Files must be in your My Drive on Google Drive online. If they are not in My Drive, they will not sync to Google Drive on your computer.
Step two - setting up offline access. Here's how:
*You can only enable offline access using the Google Chrome browser.
1. Click More
2. Select Offline Docs
3. Click the Enable offline blue button
4. Now click the blue button on the right that says Get the app. If you already have the app installed, you won't need to complete this step.
5. You'll be taken to the Chrome store. Click Add to Chrome in the upper-right corner.
6. Once the app is installed, you'll be taken to a Chrome page with the Google Drive app icon. To return to Drive, click the Google Drive icon.
Now when that pesky internet goes down, you'll be able to continue working on your documents. Any files you make changes to while offline will sync with a time stamp when you reconnect to the internet.
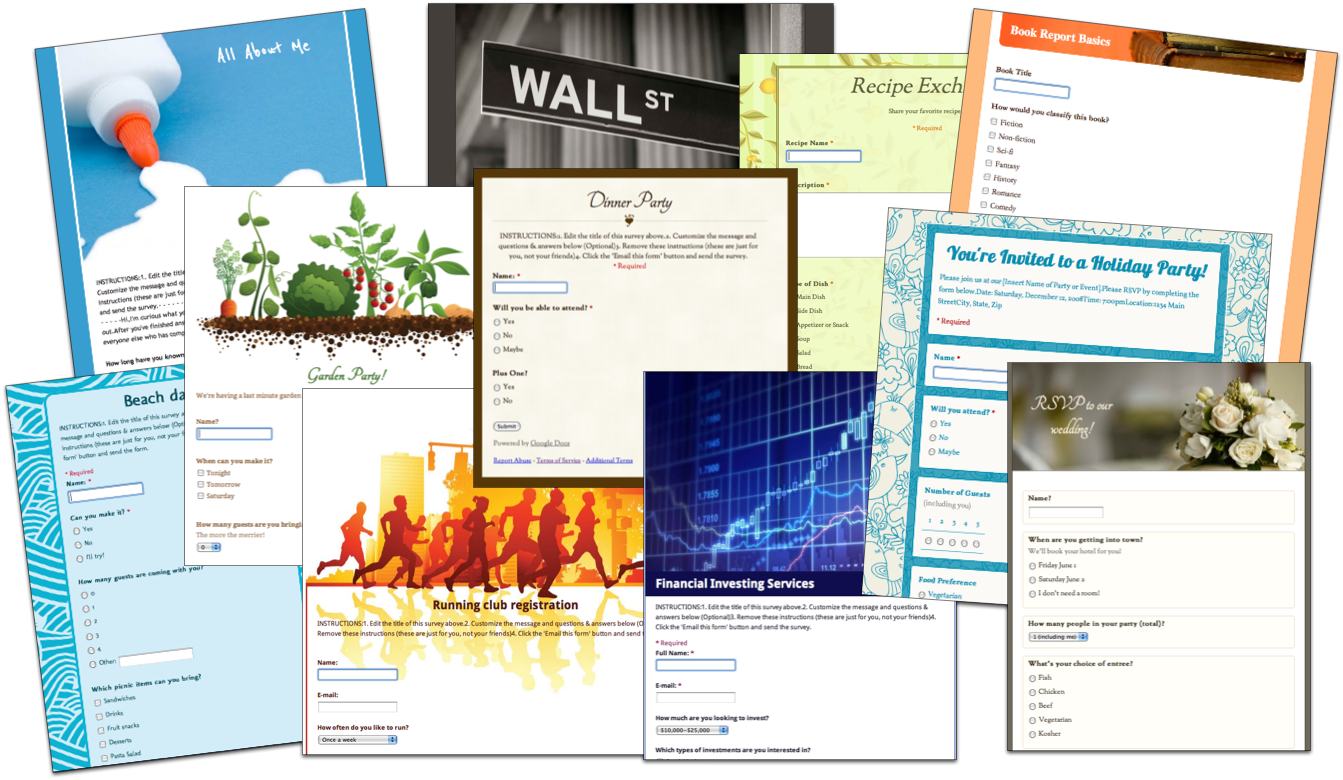
Google just updated their forms at the start of the month. Our district accounts are set-up that we will receive new updates to Google products 2 weeks after their initial release. Meaning??? We should be seeing the new Google Form look within the next week.
So what's changed?
First, you can share your form with other collaborators. If I'm a teacher using forms to create tests and quizzes, I can now share the form with my Teacher's Assistant and they can help me type in test questions. You couldn't collaborate on forms with others prior to this update.
Second, when I create a new form, I will be asked to name my form and choose a theme before I ever start creating questions.
Third, when I return to my form after the initial creation, I am taken to the editable version of my form rather than the spreadsheet with my recorded responses. However, I can still access the spreadsheet and see the live version of my form with the click of a button.
Fourth, there are now copy/paste functions that were never an option before. If you have bulleted list in a document that you want to become options for a multiple choice question, you can simply copy this list, create a multiple choice question and paste the list into the options. It will put each bulleted item as a separate option.
Fifth, the overall look to creating a form is different. It looks more like a document rather than...well I don't know what you would call the old look, but the new one looks cleaner to me.
The following video, created by the Google Guru at Ask the Guru, will give you a better visual look at the new appearance and layout of Google Forms.
Friday, I spent the day at Essdack with my Tech Integration Group. They are an awesome group of people who share their expertise, ideas and inspiration. One of the topics we focused on was the 21st Century Teacher. A site called Simple K12 posted a list of 21 Signs You're a 21st Century Teacher. The tasks are things you already do in your classroom, but then took it to the next level with the connection to technology. After reading over the list, we voted on the top 5 items through Google Moderator. (Google Moderator allows you to post topics or ideas that people can vote up or down. We use this each month to decide on the topics we will cover at our meetings.) From there, we took the top 5 items and created Wallwisher boards for each topic. We then spent time adding ideas, tools and suggestions for supporting teachers to get there. Here our boards and suggestions:
These boards are still being added to, but they are a good starting place. Personally, I had used Wallwisher in the past, but wasn't a huge fan. I started using another tool, Lino, which was like Wallwisher. Both are electronic bulletin boards centered around a specific question or topic. Then you open the board so others can contribute resources to the topic or answer the posted question. Either tool would be great for exit questions, brainstorming for a project or paper or collecting online resources centered around a topic. I could see using this as part of a web evaluation activity. The students have to find a reliable website related to a specific topic everyone is researching. They could give the link and explain how they know it is a reliable site. Here is a sample Lino canvas I used this summer during one of our training sessions:
After working with the new Wallwisher, I'm going to give it another try. Although Wallwisher doesn't have an app for the iPad, I can still go to the internet on the iPad and use Wallwisher to create new boards or respond to boards. Tom Barrett has a slideshow showing several interesting ways to use Wallwisher in the classroom. On his blog, Sean Banville provides 105 ideas for using Wallwisher in the classroom.
So, are you a 21st century teacher? Are there any signs that you use in your classroom already? Do any of the signs inspire you to try something new in your classroom?
If you've used Google Docs recently, you may have noticed the following message:
Google Docs will be switching to Google Drive soon, but you can click on the get started link now. There are a few differences between the look of Google Drive and Docs, but not much. Below is a video explaining those differences:
I just made the switch myself today and here is what I like so far (they are not in order of importance):
1. Docs shared with me, show me a picture of the owner on the document.
2. I can upload files from my computer through the Google Drive icon on my computer and I don't have to open up the internet.
3. When I'm working on a document, I can add or change the folder location right in the document.
4. I can look at my docs and collections in a visual layout rather than a list.
5. I can search for documents by their file type.
6. Under the create options, I have a more section that lets me choose from SlideRocket and Lucidchart Diagram (2 new apps added this year that associated with our Google accounts).
7. They changed the name from Collections to Folders!!!!!
Finally, for those of you who like shortcuts, here are the keyboard shortcuts for Google Drive:
In the next few days, Google will be rolling out Knowledge Graph as part of Google search. This tool will help you refine your search and present more relevant search results. For example, it you search for lion, it will help you narrow your search to the animal or the Mac operating system.
Most students do know how to do a basic Google search, but most don't know how to refine their search so they receive the most relevant information. Google has put together a new site appropriately called Google Search Education. This site contains lesson plans focused on developing and improving students' web-search skills as well as video tutorials and activities for testing searching skills.
One activity is called the "Google A Day" challenge. A day question is posted that requires students to practice their searching skills to find the correct answer. The questions focus on a variety of content areas and would be a great opener activity for students to start the class hour.
The lesson plans are divided by the skill levels of the learners and provide a unit guiding question, lesson guiding questions and skills to accomplish. The Lesson Plan Map page shows an overview of all the lessons and includes the Common Core and Technology Standards for the lessons. The individual lessons are detailed with the above information as well as the resources/materials, time frame, notes to teachers, lesson details and assessment ideas. The lessons were created in Google Doc and allow you to download them in various formats. (Check out this sample lesson - Narrowing a search to get the best results)
So why do we really need to teach searching skills to students? Well, the pat answer is that this skill is part of the Common Core Standards. Any time the standards talk about media literacy and P21 Skills, web searching and evaluation is always a competent. Of course, beyond the standard is the simple real-world application of searching for a job related project or personal information. Learning advanced searching skills will provide more relevant results and save time.
This blog contains a plethora of resources that can be used by teachers in the classroom. Each daily post provides a summary of the resource, links and/or videos, and applications in education. At the end of each post you will also find suggests for other resource posts similar to the one you are reading that you might like.
In addition to the daily posts, you will find free downloadable eBooks full of technology ideas to help teachers out in the classroom. Some of the titles included are: The Super Book of Web Tools for Educators, How to Do 11 Techy Things in the New School Year and Google for Teachers. The site also includes pages full of Google tutorials, helpers for creating blogs and websites, resources for developing a personal learning network, and more.
Source: "Doodle 4 Google âDoodle 4 Google." Google. N.p., n.d. Web. 4 Mar. 2012. <http://www.google.com/doodle4google/index.html>.
The Doodle 4 Google 2012 competition will be closing this month, but there is still time for your students to enter. Google has been creating their famous doodles since 1998 beginning with a basic doodle
Source: "Burning Man Festival."Google. N.p., n.d. Web. 4 Mar. 2012. <http://www.google.com/doodles/burning-man-festival>.
The doodles have focused on historical celebrations, science, innovation, cultural celebrations and more. This marks the 5th year Google has held the Doodle 4 Google competition.
Any K-12 student may enter this competition. Their doodle must center around the theme "If I could travel in time, I'd visit..." Students must complete an entry form, signed by their parent or guardian, with their doodle and may only submit one doodle. The national winner receives a $30,000 scholarship for college and a $50,000 technology grant for their school.
Needing images for a project or presentation? When you do a basic Google search you can get thousands of pictures, but they are not all fair game for use in your project or presentation. Many of them are copyright protected and are not free to use even for an educational project or presentation. (I'll write more on this in a future post.) The video below will show you how to search for images on Google based on their usage rights.
This would be a great video to share with your students prior to them looking for images to use for a class project.
Once you have your image, don't forget to give credit to your source. The best format I have seen is as follows:
Source: "image name," site published on, user/artist, Creative Commons License (if applicable), comma and URL
Your Google account has a new feature - SlideRocket. SlideRocket is a presentation maker similar to PowerPoint and Keynote, but with a few extra perks.

 Ten Reflective Questions to Ask at the End of Class