-
Extensive collection of historical photos from 1850 to 1940. Great tool for enhancing history lessons.
-
Graphing Stories - 15 seconds at a time
"Real World" videos by Dan Meyer and Buzz Math focusing on graphing measurement themes. Videos cover topics like height, distance, time and elevation. Videos can be downloaded to avoid buffering issues.
-
Free online history resources and videos
-
This site will let you see what 200 calories worth of french fries vs. lettuce looks like. You can get nutritional information on various foods including some fast foods..They'll even show you what to do to burn those calories off. This site has not officially launched yet, but has some great information for health and FACs classes.
-
This blog has some great ideas for apps that can be used by the PE Teacher. Jarrod, the author of The PE Geek, also provides resources for using 21st century tools in the PE.
Thursday, February 28, 2013
Website Wednesday
Tuesday, February 26, 2013
What to do with a snow day!
 We are into our 4th snow day with a weekend in between! Ever wonder what educators do on their snow days? Some will spend time entertaining their children who are also stuck at home. Some will watch movies, read a good book, play video games and shovel their sidewalk and driveway. Some will clean their house, cook or bake, and clean out that closet that has been haunting them for months. A few will get out the computer and write up lesson plans or search for new lesson and classroom ideas to pin on Pinterest. While an even smaller percent will work on that college class they are taking and try to complete the project that is due this week.
 |
| Grandmother's door and window |

2. I uploaded all formats of documents - Word, Pages, Keynote, pdf, etc. I also upload images, videos and a few audio files. While I can't directly open some of these files in Google, I can download them onto my computer - or a new computer if something happened to mine. I also weeded out any files and documents that I don't need or use any more.
3. I deleted documents and files from my computer that I don't use regularly or are a pdf format after I uploaded them to Google. This was a personal choice, which allowed me to free up some space on my computer.
After I finished with this project, I moved on to my photos. While I don't have thousands of photos on my school computer, I do have quite a few on my personal computer. Since I already have a gmail account, I decided to use Picasa - this is a Google product - to store my photos in the cloud. I did discover that Picasa with my school email looks different than with my personal email. I have a Google+ account with my personal email which accounts for the difference.
 |
| Picasa with school account |
 |
| Picasa with personal account |
Here's how I got started:
1. I went to the Picasa website - https://picasaweb.google.com/home
2. Logged in with my email account. If you are using a personal account, it will have your sign up Google+ as part of the process. What is Google+? In a nutshell, this is Google's version of Facebook.
3. I clicked on upload, entered the name of my album and did a drag & drop of photos from iPhoto into the album. This worked in most cases, but I did have a few times when I had to take the photos from iPhoto, put them in a folder on my desktop and then drag them over from the folder to upload them into Picasa. I don't know why, but as long as I had a work around I don't care about the why.
Since doing this with my photos, I found that I can send directly to a Flickr account from iPhoto. Here's how:
1. Open iPhoto
2. Click on Share
3. Choose Flickr
4. Choose set-up

6. Once you've authorized the Flickr account to iPhoto - read and follow the instructions - you can start uploading photos.
*Note: If you have movies within an event, then make sure you go into the event and just choose the photos to upload.

I finished up with my photos on Sunday and decided it was time to tackle the music. I don't know about others, but I have more music and audiobooks on my computer than photos. I think it's because I work better with music playing in the background. I'm one of those people who would love to have theme music playing as I go through each day. Sometimes a piece of music does pop into my head and starts playing during certain situations.
Tuesday, February 19, 2013
S'more - not just for eating

On this winter day, my heart was elated to find another s'more. It might not be ooey, gooey, chocolatey, but it's still a great treat to explore! Smore is an online flyer creator that can publish your flyers instantly via Facebook, email or embedding to a website or blog. When you create your flyer, you can add text, photos, videos and audio. You can choose from various design backgrounds and colors. The most difficult element in creating a flyer is deciding what you would like to say.
Here is a completed smore flyer:
S'more photo by Colin Purrington http://www.welovedc.com/wp-content/uploads/2008/12/smore-by-colin-purrington.jpg
- advertising school or class events
- creating book reports
- creating profiles on historical figures
- making an order of operations poster
- explaining the food chain or water cycle.
Wednesday, February 13, 2013
Website Wednesday
-
Online Jeopardy template creator. Create you own Jeopardy games or search & borrow games created by other people.
-
Friday Five: 5 Fantastic Apps for the Common Core | TeachHUB
The Common Core State Standards are here. These are the apps you need.
-
Have your students create their own story with this tool. They can create characters, dialogue and add theme music. When finished, you can watch the story unfold in a video format. Great for digital storytelling!
-
"...a multimedia project that immerses players in U.S. history content through free interactive games." Students can learn about the Revolutionary War and Slavery through these interactive games. Registration is required. Educators guides available on the site.
-
Encyclopedia of Life - Animals - Plants - Pictures & Information
Free online resource covering content about all life on Earth in all formats - text, video, photo, audio, maps, and more.
-
One stop resource for teachers! Find lesson and project ideas to use in science and math.
Digital Citizenship Resources

There are many great tools and resources online to help educators and parents learn about and address digital citizenship and cyberbullying with students. Below is a collection of digital citizenship sites with lesson ideas, tips for talking to your children and recommendations for Facebook privacy settings.
-
Provides information for educators, parents and students to become more familiar with what digital citizenship is and how become a better digital citizen.
-
Digital Citizenship and cyberbullying resources from Kevin Honeycutt
-
60-minute lesson plan - students learn about the digital footprint they leave when using various online tools. Lesson posted by the National Association for Media Literacy Education
-
Find lessons on digital literacy and citizenship appropriate for your students. Search by grade or digital skill.
-
Specific for grades K-6
-
An infographic on Facebook & Google+ privacy
-
Recommended Facebook privacy settings for teens. Contains charts you could share out.
*Image found at https://blogger.googleusercontent.com/img/b/R29vZ2xl/AVvXsEjHq90tHd1ygWoLkwSDMGdgMVY5Xl9oNCeMN12wMw0V8eH0snagUbbVpSJVeuL2Fiq4NkQwkgAzHqB_zouqjldrn4H_EjcQpTlyVn_xdxH_opd8poMwx7nAyWiBngtNjZIjWtgVArzab3c/s1600/digital+citizenship.jpg
Tuesday, February 12, 2013
Google Drive Offline


2. Click on Download Google Drive
3. Open the installgoogledrive.dmg (It might be in your downloads folder.)
4. Open the installation file and drag the Google Drive icon to your Applications folder
5. Open Google Drive from your Applications folder (You may receive a warning that Google Drive is an application downloaded from the internet. Click the Open button.)
6. Enter your school email account and password. This will be the account associated with Google Drive on you computer.
7. Launch Google Drive via the icon on your toolbar.
*Files must be in your My Drive on Google Drive online. If they are not in My Drive, they will not sync to Google Drive on your computer.
Step two - setting up offline access. Here's how:
*You can only enable offline access using the Google Chrome browser.
1. Click More
2. Select Offline Docs
3. Click the Enable offline blue button
4. Now click the blue button on the right that says Get the app. If you already have the app installed, you won't need to complete this step.
5. You'll be taken to the Chrome store. Click Add to Chrome in the upper-right corner.
6. Once the app is installed, you'll be taken to a Chrome page with the Google Drive app icon. To return to Drive, click the Google Drive icon.
Now when that pesky internet goes down, you'll be able to continue working on your documents. Any files you make changes to while offline will sync with a time stamp when you reconnect to the internet.
Internet Down image from https://blogger.googleusercontent.com/img/b/R29vZ2xl/AVvXsEhZoriHaU9QLodTGKZPQt1GP_6P7tnvfWT6vjVne_yfspO0msxxRjOKGnt2XRmEPDETNKR0Q0ranFyarHJOb26AxnQNLR6NKXYyu6c20ljIdZyp9uENurzuuSnTm-9I-zh0A00pHLh6R7s/s1600/Internet_down.jpg
Instructions for installing Google Drive found at http://support.google.com/drive/bin/answer.py?hl=en&answer=2375078&topic=2375002&ctx=topic
Instructions for setting up offline access found at http://support.google.com/drive/bin/answer.py?hl=en&answer=2375012&topic=2375002&ctx=topic
Friday, February 8, 2013
Top 5 Superbowl Commercials
#5 Where do babies come from?
Got to love The Wheels on the Bus
#4 The Rock runs out of milk
It's The Rock. What else can you say?
#3 Doritos Goat for sale
A screaming goat?!
#2 GoDaddy gross-out
I found this one to be a little gross myself.
#1 Budweiser clydesdales
It's like those Hallmark commercials that make you break out the tissues.
Those may be the top 5 talked about commercials, but having been a librarian I had to laugh at the Oreo "Whisper Fight" commercial. I was never a shushing librarian myself. I was probably the loudest one in the room.
Google Forms Gets a New Look!
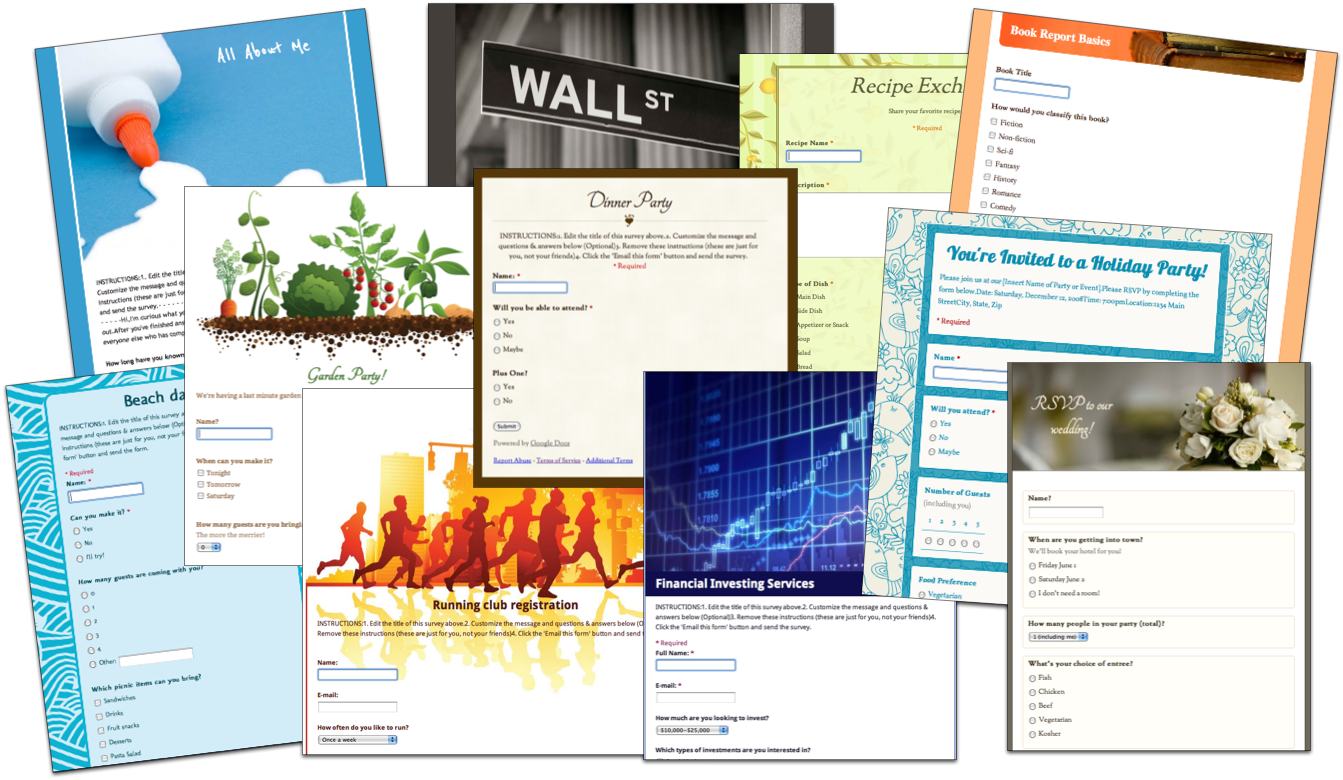
So what's changed?
First, you can share your form with other collaborators. If I'm a teacher using forms to create tests and quizzes, I can now share the form with my Teacher's Assistant and they can help me type in test questions. You couldn't collaborate on forms with others prior to this update.
Second, when I create a new form, I will be asked to name my form and choose a theme before I ever start creating questions.
Third, when I return to my form after the initial creation, I am taken to the editable version of my form rather than the spreadsheet with my recorded responses. However, I can still access the spreadsheet and see the live version of my form with the click of a button.
Fourth, there are now copy/paste functions that were never an option before. If you have bulleted list in a document that you want to become options for a multiple choice question, you can simply copy this list, create a multiple choice question and paste the list into the options. It will put each bulleted item as a separate option.
Fifth, the overall look to creating a form is different. It looks more like a document rather than...well I don't know what you would call the old look, but the new one looks cleaner to me.
The following video, created by the Google Guru at Ask the Guru, will give you a better visual look at the new appearance and layout of Google Forms.
Thursday, February 7, 2013
You're a 21st Century Teacher if...

http://wallwisher.com/wall/97lhhagh7o
http://wallwisher.com/wall/llaqcd8lh7
http://wallwisher.com/wall/nmvjjbqy99
http://wallwisher.com/wall/g9gvffjham
http://wallwisher.com/wall/issvht25m0
These boards are still being added to, but they are a good starting place. Personally, I had used Wallwisher in the past, but wasn't a huge fan. I started using another tool, Lino, which was like Wallwisher. Both are electronic bulletin boards centered around a specific question or topic. Then you open the board so others can contribute resources to the topic or answer the posted question. Either tool would be great for exit questions, brainstorming for a project or paper or collecting online resources centered around a topic. I could see using this as part of a web evaluation activity. The students have to find a reliable website related to a specific topic everyone is researching. They could give the link and explain how they know it is a reliable site. Here is a sample Lino canvas I used this summer during one of our training sessions:
After working with the new Wallwisher, I'm going to give it another try. Although Wallwisher doesn't have an app for the iPad, I can still go to the internet on the iPad and use Wallwisher to create new boards or respond to boards. Tom Barrett has a slideshow showing several interesting ways to use Wallwisher in the classroom. On his blog, Sean Banville provides 105 ideas for using Wallwisher in the classroom.

Tuesday, February 5, 2013
Components of a 21st Century Classroom Infographic
 |
| Click link to see full view - http://www.opencolleges.edu.au/infographic/media/21st_century_classroom.jpg |
As I looked over the stats, I was surprised by the integration of social networks and the 29% to 80% ratio between public teachers and college professors. I'm not surprised by the use of social networks, but I'm surprised by the percentage difference.
Do you agree with these statistics?
What areas surprised you?
Website Wednesdays
-
Find lessons on digital literacy and citizenship appropriate for your students. Search by grade or digital skill.
-
Specific for grades K-6
-
All sizes | QR Code Periodic Table with Symbols | Flickr - Photo Sharing!
Be sure to share on "Large" but scan the codes on "original"
-
Five Reasons I Love Using QR Codes in My Classroom | Edutopia
There are so many tools that educators can use to get students interested and engaged in their work. Like most teachers today, I integrate technology into my instruction everyday. I'm lucky to work in a school with one-to-one technology and use iPads with my students throughout every school day. That makes it easy to use QR codes in my classroom -- and there are many reasons I love using QR codes!
-
Twelve Ideas for Teaching with QR Codes | Edutopia
"As mobile learning becomes more and more prevalent, we must find effective ways to leverage mobile tools in the classroom. As always, the tool must fit the need. Mobile learning can create both the tool and the need. With safe and specific structures, mobile learning tools can harness the excitement of technology with the purpose of effective instruction. Using QR codes for instruction is one example of this. "
-
50 QR code resources for the classroom | ZDNet
"In the classroom, QR codes can be used in a variety of ways -- from conducting treasure hunts to creating modern CVs. Below is a number of articles, tutorials and lesson plans designed to help educators. "
-
QR Codes In Education - LiveBinder
a simple livebinder chock full of QR info!
-
Got this one from Glenn Wiebe @ Essdack - Luke Neff has created and shared tons of writing prompts geared toward social studies and history. You might even get inspired to create from prompts of your own.
-
This blog gives a day by day account of the bloodiest war in America's history. Each posting presents the news as it happened during the Civil War to the day. Great resource for history teachers and students!
Monday, February 4, 2013
Common Core, Effective Instruction and Techonlogy with Glenn Wiebe

Here are some resources for obtaining lesson plans and ideas for using Google Earth in the classroom:
Classroom Resources: Lesson Plan Library
Google Earth Lessons - Provides lessons for actually using Google Earth as well as student and teacher controlled lessons
Teaching & Learning with Google Earth - Lessons are grouped by primary level and secondary level
Google Earth for Educators: 50 Exciting Ideas for the Classroom - Find lesson plans and virtual tours for various grade levels
Google Lit Trips - Use these trips to follow the journey of characters in famous literary and bring a new level of engagement to your students with photos and questions centering about various aspects of the novel
Google Earth - Wiki with various resources and samples
Google Earth Education Community - How-to helpers for Google Earth and links to Google Earth lessons
Need help understanding how to work with Google Earth? Check out the print and video resources at http://support.google.com/earth/bin/answer.py?hl=en&answer=176576&ctx=cb&src=cb&cbid=-1hedy4f7grmjn.
Later in the afternoon, Glenn shared some great Google search strategies that will benefit teachers and students. They are the 2M List, quotation marks, title, site and file.

Quotations Marks - Put your search phrase in quotation marks to get that exact wording. This is a great way to check student writings for plagiarism. If some wording doesn't sound like the student, then put that phrase or sentence in quotation marks for a Google search. If it was copied from the Internet, it will show you the source.

Title - If you need a particular word or phrase to be in the title of a website, then type intitle: and your word or phrase in quotation marks.
Site - Use site:site type (edu, com, org, net) and your term to narrow your search results.
Site Types:
.com - used for commercial purposes, usually by corporations and businesses
.edu - used by educational organizations
.net - used by internet related companies, but also used by all types of businesses
.org - used by organizations, usually nonprofit like Red Cross
*You can also search by country site. For example, .us is for United States and .uk is for United Kingdom.
File - Search by a specific file type like powerpoint by using filetype:ppt and then your search terms.
Possible File Extensions:
.gif OR .jpg OR .tiff - images
.doc - documents
.ppt - powerpoint
.mpg OR .mov - movies
.pdf - portable document files
Glenn ended our time by talking about Visual Discrepant Inquiry. In simplest terms, you give students part of an image and ask them to tell you what the photo is about - time, place, overall content or focus of the image - from the portion they can view. Slowly you reveal more of the image and have students continue the investigation of the photo. The key element that reveals the significance behind the image isn't revealed until the end. Glenn explains the process in more detail in this article - http://historytech.wordpress.com/2009/02/27/tip-of-the-week-visual-discrepant-event-inquiry/. It was an intriguing activity and not hard to duplicate with Keynote or Powerpoint and a projector.
Throughout his instruction, Glenn also provided staff with time to explore various web tools he introduced throughout the afternoon. In our district, some of the sites are only available to staff and some have been opened up for student use.
Research
BibMe - Create a bibliography for your works cited. We also have EasyBib available through Google Docs which not only allows students to create an MLA formatted works cited, but it then downloads right into Google Drive.
ReadLists - A group of web pages - any type - bundled together in an eBook format. Here's a sample
Shmoop - Provide learning guides, homework helpers and test preps for anyone wanting to learn. Shmoop also provides indepth literature analysis for those complicated text. Resources are available in Spanish.
KeepVid - (only open to staff) Download videos from the web onto your computer to prevent issues with buffering. This works great for those YouTube videos you want to show in class, but stall out from the buffering.
Readablility - Turns a web page into a readable document that you can save for later once you create a free account. Good for those great articles you stumble upon during the day, but don't have time to read in depth. Save it to Readability and read the articles as time permits. You can get the Readability app for your Android, iPad, iPod or iPhone.
Evernote - Set-up a free account to save your notes (text and audio), webpages, lists and more. Evernote is accessible and syncs your account on the computer, website and mobile apps. Great tool to use when researching on the internet. You can get the Evernote app for your iPad, iPod or iPhone.
ThinkFinity - (only open to staff) Use the search box on the right-side of the home page to search for lessons based on standards, grade level and content area. If you are trying to search by Common Core standards, scroll past all the regular state standards - the common core are listed below the regular state standards.
Advanced Google Search - Use the advanced tools when searching in Google. This will help you narrow your search and obtain the information you are seeking without wading through millions of web sites.
Critical Thinking
Google Earth - This program allows you to take a virtual journey of the globe. You can explore terrain, 3D buildings and more. Resources for Google Earth were provided in the beginning of this post. This program is available on every staff and student computer in our district.
YummyMath - Get ideas for bringing real-life into the math classroom. Searchable categories include Algebra, Number Sense, Data & Probability, Geometry and more.
Google Earth Math - Provides Google Earth math map lessons for use in the classroom.
Visually - Search for infographics to enhance your curriculum in the classroom. You can also create your own infographics at this site.
Infogram - Create interactive inforgraphics and charts for the classroom OR have students create an infographic to share stats and content. Create an account for free.
Common Core
Diigo: Glenn Wiebe Common Core - 40 website links centered around common core
Diigo: Common Core - 578 sites that have been tagged as common core
Collaboration
Google Drive - Share and collaborate in real-time, create documents, presentations, spreadsheets and forms, and store various file formats, photos and videos. Every staff and student in our district has an account to access Google Drive.
My Big Campus - Engaging online environment for your classroom. Share assignments, tests, slideshows and other resources to students whether they are in class or not. Our technology department is exploring this venue to replace Blackboard.
Dropbox - Store and share your documents, photos and videos. Not as user-friendly for collaboration.
Communication
Ted-Ed - Videos that can be used to enhance your current curriculum or to be viewed by students as homework in preparation for the upcoming lesson. You access resources to dig deeper and some videos provide questions to get students thinking about the content they viewed.
Little Bird Tales - Use this tool to create, record and share online stories. Check out the demo video below:
Celly -This is a group messaging and communication service you can use via a cell phone or web browser. Check out the Celly for Schools Set-up Guide and Celly for School for ideas on using Celly in your school and classroom.
PrintFriendly - Use this tool to print only the text on a web page. Just copy the URL, go to PrintFriendly and paste the URL in the box. Hit return and wait for your PrintFriendly view to appear. You can remove any text from your new document before hitting print. This will save you from printing those worthless blank pages.
Slideshare - Store and share your slideshows and pdf files through Slideshare. Once uploaded, you can embed your files and slideshows on a website or blog. You can view and use slideshows shared by other people. Great way for students to share their presentations in real-life.
Socrative - Engage students in games, polls, quizzes and tests through Socrative. It is similar to using a clicker system, but students can respond via the Socrative student app available for iPad, iPod and smart phones. Students can also respond via a web browser on the computer. The main Socrative website is blocked by our district filter for students, but they can access your classroom by using the following URL - http://m.socrative.com/student/#joinRoom.
Below are additional resources from Glenn's Presentation:
Social Studies Central - Links to all of Glenn's handouts, presentations and web sites.